

3 How to Photograph Your Store Environment? Let Customers Get to Know Your Space Before Visiting
From the storefront and entrance to the interior layout, use real photos to help customers find you and plan their visit
What areas should you photograph for your store environment? This article covers key shooting points for the storefront, entrance, business space, and facilities, along with methods for handling lighting, angles, and image descriptions. It helps restaurants, retail stores, and service merchants present their real environment, so customers can understand the space, recognize the entrance, and judge whether it suits their needs before visiting.
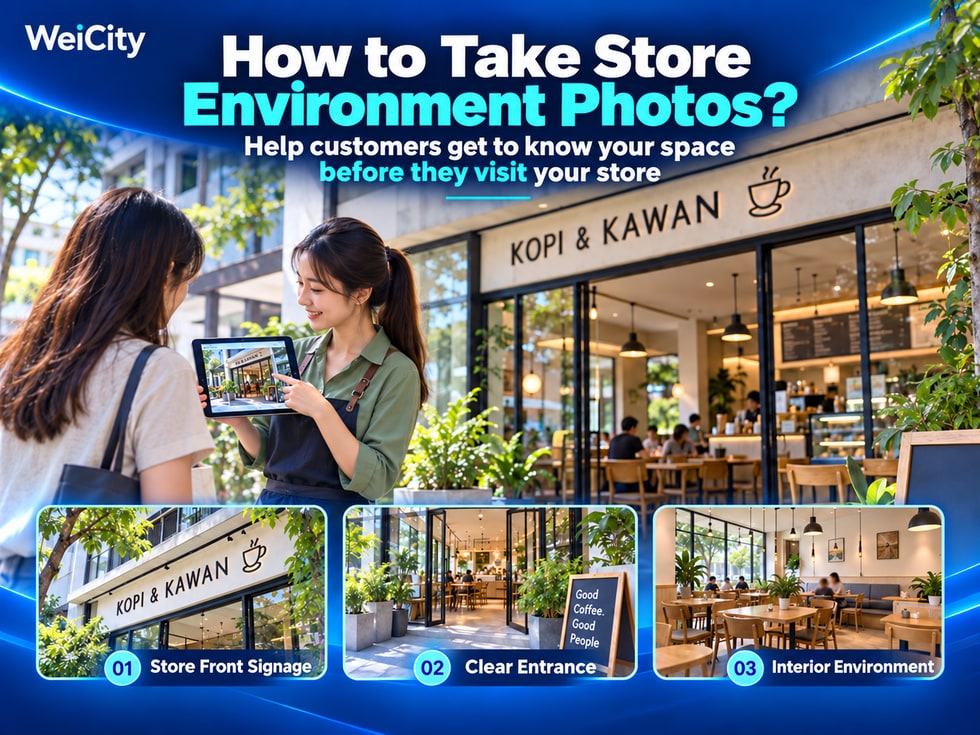
When customers are preparing to visit in person, they may want to know more than just the address. They may also want to understand what the store actually looks like in advance.
For example, restaurant customers may want to see the seating and dining atmosphere; retail customers may want to understand product displays; customers booking services may want to first get familiar with the reception and service areas.
📸 Showing your real store environment through the WeiCity Merchant Gallery can help customers get familiar with your storefront, entrance, interior space, and related facilities in advance, making their visit easier to plan.
When photographing your store environment, start by thinking from the customer's perspective.
First-time visitors usually want to know:
📍 Store location: Once they arrive nearby, how can they recognize your store?
🚪 Store entrance: Where should they enter? Do they need to go upstairs?
🪑 Interior space: What does the inside look like? What are the main areas?
🛎️ Service facilities: Is there a reception area, waiting area, or other facilities?
🚗 Visit arrangements: Are parking, stairs, or elevator locations easy to find?
Different types of merchants will benefit from showing different environment photos.
🍽️ Restaurants: Show the dining area, seating arrangement, and overall atmosphere.
🛍️ Retail stores: Show shelves, product displays, and store aisles.
💇 Beauty and hair salons: Show the reception area, waiting area, and service spaces.
🎓 Education centers: Show classrooms, learning environments, and related facilities.
🛠️ Service merchants: Show the reception location, work areas, and service environment.
📌 When photographing your store, you can follow the route customers actually take, moving from outside the store to inside.
Storefront photos should, as much as possible, show your signboard, shop door, and an easily recognizable exterior at the same time.
Before shooting, stand in the direction customers usually approach from and observe what they will see first.
✅ Store signboard: Make sure customers can clearly read your business name.
✅ Store entrance: Show customers where to enter.
✅ Building exterior: Help customers identify the location of your store.
✅ Surrounding environment: Where appropriate, show easily recognizable external features.
For example:
If your restaurant is located in a row of shophouses, you can photograph the full storefront so customers can see the signboard, entrance, and store exterior.
If your store is inside a shopping mall, you can add the floor, corridor, or nearby easily recognizable landmarks.
If your store is on the second floor, you can also photograph the building exterior and state which floor the store is on.
📸 Avoid only taking close-ups of the signboard. Even if the sign is clear, customers may still not know where the actual entrance is.
Some store entrances are not directly below the signboard, and customers may need to pass stairs, elevators, or shared corridors.
In these cases, you can take additional photos of key locations so customers know where to go next.
For example:
🏬 First photo: Building entrance
Show customers which building door to enter through.
🪜 Second photo: Stairs or elevator location
Explain the correct route upstairs.
🚶 Third photo: Floor corridor
Show the direction to walk after reaching the designated floor.
🚪 Fourth photo: Store doorway
Help customers confirm they have reached the right place.
If the store entrance is somewhat hidden, you can add simple directions in the photo caption.
For example:
📍 The store is on the second floor.
🚪 Enter through the entrance on the left side of the building.
🪜 Go up the stairs and continue straight.
🏪 Look for the blue signboard to find the store.
The above is only an example. Merchants should fill in according to their actual route.
If customers need to ring a doorbell, make an advance appointment, or enter from a side door, you can explain this in the related text.
Clear entrance photos can reduce the number of customers who still cannot find the store after arriving nearby.
After entering the store, choose a position that shows the main business areas and take photos of the overall environment.
Different merchants can choose their focus based on how they operate.
Showcases:
🪑 Dining seats and table arrangement.
☕ Counter and ordering area.
🏪 Overall store space.
🌿 Main decor and dining environment.
Showcases:
🛒 Main product displays.
📦 Shelves and display areas.
🚶 Store aisles.
💳 Checkout counter.
Showcases:
🛋️ Reception and waiting areas.
💇 Actual service spaces.
🚪 Main entrance and indoor layout.
🧴 Equipment or facilities related to services.
When shooting, make sure customers can understand the relationship between different spaces.
If you shoot too close, you may only see decor; if you shoot too far, the main facilities may be hard to see.
📌 One overall photo helps customers get familiar with the space, and other photos can add important areas and facilities.
Environment photos are best taken when lighting is sufficient and the store is tidy.
If there is natural daylight, you can use light from windows to make the space and displays easier to see.
If your store mainly operates in the evening, you can also add nighttime photos to show the environment customers actually experience when they visit.
When shooting, pay attention to:
☀️ Natural light: Make the colors of the space and main facilities easier to identify.
💡 Indoor lighting: Check for areas that are too dark.
🪟 Window brightness: Avoid bright light outside the windows that makes interior details hard to see.
🌙 Nighttime environment: If you operate in the evening, you can show the actual nighttime atmosphere.
For example:
For a café that operates during the day, you can photograph the seats and counter when there is plenty of natural light.
For a restaurant that operates in the evening, you can add photos of nighttime lighting and the dining environment.
When adjusting photo brightness, keep the original atmosphere of the site so the photos match the actual environment.
📸 A good environment photo does not necessarily need to be especially bright; what matters is that customers can clearly see the real space.
When shooting with a phone, keep the lens level and check whether door frames, walls, and counters appear noticeably tilted.
You can adjust the shooting angle based on the size of the space, but try to keep proportions realistic.
📱 Keep the lens level: Reduce noticeable tilting of walls, door frames, or counters.
↔️ Choose a suitable distance: Make sure the main areas appear completely in the frame.
🔍 Avoid excessive wide angle: Reduce cases where the space looks obviously stretched.
📸 Shoot separately: If one photo cannot show a complete area, add other angles.
For example:
If a beauty salon has both a reception area and a service area, you can photograph the two areas separately.
There is no need to force every space into the same photo.
Wide-angle lenses can fit more into the frame, but excessive stretching may make a room look larger than it actually is.
Do not deliberately use angles that could cause misunderstanding just to make your store look bigger.
Beyond overall photos, you can add facilities customers often ask about, based on your actual operations.
👶 Children's seats: If the restaurant provides children's seats, you can show the seats and the areas where they are available.
💻 Computer use space: If there are seats suitable for using computers, you can show the desk and related facilities, and explain the conditions of use.
🚗 Parking location: If there are designated parking spaces, you can photograph the actual location and explain the parking arrangements.
🛗 Elevators and stairs: Show the route customers need to take when visiting the store.
🪑 Waiting area: If appointments or queuing are required, you can show the waiting space.
🚻 Other facilities: Display facilities that customers may want to know about in advance, based on actual conditions.
For example:
An education center on the second floor can show:
🏬 Building entrance.
🛗 Location of elevator or stairs.
🚪 Entrance of the education center.
🪑 Reception and waiting area.
🏫 Main learning space.
If customers have mobility limitations or other special needs, photos can provide some reference.
However, a single photo of the entrance may not be enough for customers to judge whether the entire route to the store suits them.
📌 For accessible routes or special facilities, clearly explain the actual conditions and encourage customers who need them to contact you in advance to confirm.
Before shooting, check the tables, floors, counters, and entrance.
Put away temporary cartons, cleaning tools, and unnecessary clutter to keep the picture clear.
Recommended checks:
✅ Entrance area: Make sure the signboard and shop door are easy to see.
✅ Tables and counters: Avoid displaying too many unrelated items.
✅ Store aisles: Make sure no temporary items are blocking the way.
✅ Product displays: Make sure they match the current business status.
✅ Service areas: Keep them clean and suitable for public display.
A tidied space should be close to a state you can realistically maintain during regular business.
If customers appear in a photo, choose a different angle or shoot when fewer people are around, and try to avoid capturing identifiable faces.
Also watch out for:
🔸 Order documents on the counter.
🔸 Customer names and phone numbers.
🔸 Computer or point-of-sale screens.
🔸 Booking records and personal information.
🔸 Internal materials not suitable for public viewing.
📌 When showing the store environment, avoid capturing customers' personal information or information not suitable for public viewing.
Captions for environment photos can tell customers directly where the place is and what it is used for.
Not every photo needs to use the same wording.
For example:
🏬 Shop front
The signboard is on the first floor, and the entrance is the glass door on the right.
🪑 Indoor dining area
Shows general seating and table arrangement.
🛎️ Reception and waiting area
Customers can check in at the counter upon arrival.
🚪 Second-floor entrance
Take the stairs on the left side of the building to the upper floor, then walk straight ahead upon arrival.
🛍️ Product display area
Shows the main product displays and shopping space in the store.
Naturally use merchant names, service types, and area names related to the photo.
For example:
❌ Store Photo 1.
✅ Indoor seating and dining environment of a coffee shop in Penang.
❌ Storefront.
✅ Front view and main entrance display of a flower shop.
❌ Classroom.
✅ Classroom and teaching space of a children's learning center.
The above are only writing examples. Location and business names should match the merchant's actual situation.
If WeiCity's current image management feature supports alt text, you may also add a short, accurate image description.
📌 Each photo should prioritize its own focus. Do not repeatedly stack the same keywords just for SEO.
After changing the signboard, adjusting the entrance, renovating, or rearranging seating, check whether the existing photos are still accurate.
For example:
🏪 Signboard change: Update the storefront photos.
🚪 Entrance change: Re-shoot the route to the store.
🪑 Seating adjustment: Update the indoor space photos.
🎨 Renovation: Replace images that no longer match the current environment.
🚗 Parking arrangement change: Update parking locations and related information.
If an old photo is still useful for reference, you may note the shooting date and background.
However, photos used to help customers find the store and understand the current environment should prioritize the latest version.
If a merchant operates multiple branches, environment photos for different locations should be clearly distinguished.
For example:
🏪 Penang branch | Shop front.
🪑 Kota Kinabalu branch | Indoor dining area.
🚪 Kuala Lumpur branch | Mall entrance location.
Do not mix photos from different branches without noting their locations.
Showing customers photos of the correct branch reduces information errors before they visit.
Merchants can prepare a set of store environment photos in the order of front, entrance, overall space, and key facilities, and display them in the WeiCity merchant channel.
A simple organizing order is:
📍 Group 1: Shop front
Help customers recognize the shop and signboard.
🚪 Group 2: Entrance route
Help customers understand how to enter the store.
🪑 Group 3: Interior environment
Show the main business areas and spatial layout.
🛎️ Group 4: Key facilities
Add seating, parking, reception, or other facilities that customers may care about.
When customers ask about the address or visit arrangements, you can also guide them to the relevant photos to further confirm the entrance and on-site conditions.
For restaurants, retail shops, beauty salons, education centers, and other physical merchants, authentic environment photos can help customers who are visiting for the first time understand the store in advance.
🏪 Photos help customers recognize the store and understand the space, making it easier to arrange a visit that suits them.
🌐 WeiCity | Let customers get to know your store in advance, from viewing the environment to further inquiries and arranging a visit.